
How to Test a Golf Cart Solenoid: Coil, Contacts and Voltage Drop
A click only proves the coil moved. Here's how to test both halves of a golf cart solenoid with a multimeter, in the cart and on the bench, with coil resistance values from Club Car manuals, FSIP controller sheets and Albright's contactor data, plus what each reading means.
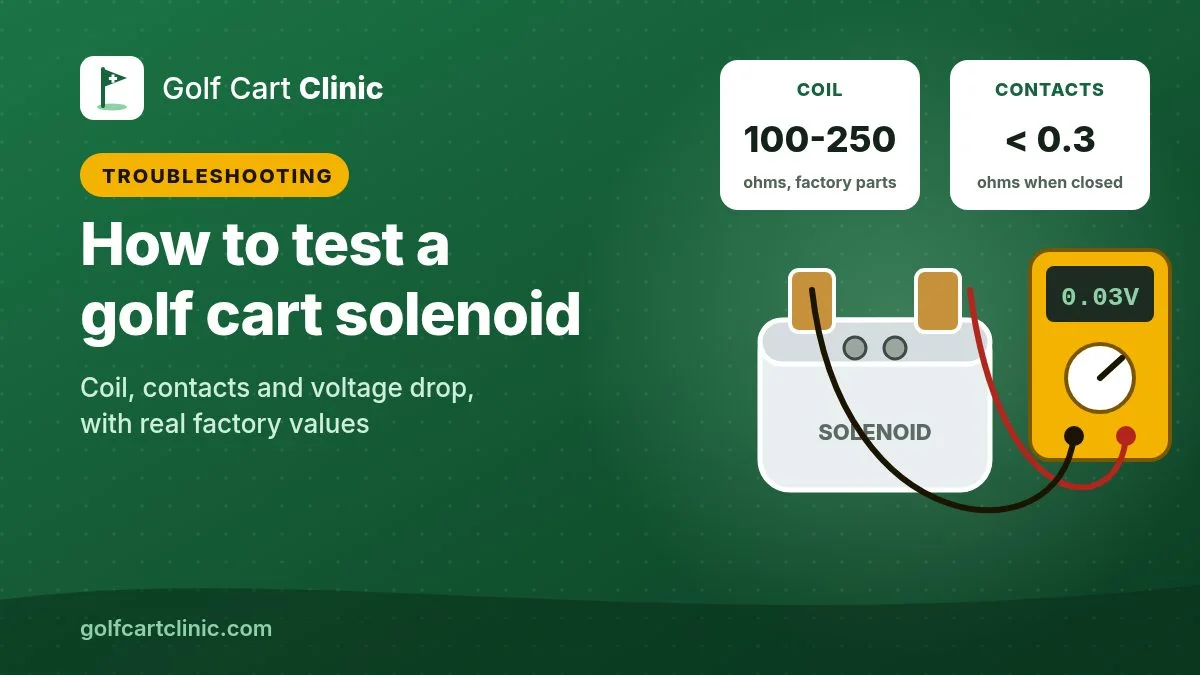
Quick answer: test a golf cart solenoid in two halves. The coil (two small terminals) should get close to full pack voltage when you press the pedal and, with the wires off, read the resistance listed for your cart, usually somewhere between about 100 and 250 ohms on factory 36V and 48V parts. The contacts (two big posts) should read open at rest and close to zero once the solenoid clicks: under 0.3 ohm on the bench, and almost no voltage across them while the motor is turning. A click alone proves nothing about the contacts.
Safety first: this is a high-current job. A 36V or 48V pack can dump hundreds of amps through a wrench, ring or watch and weld it in place. Before you touch the solenoid:
- Tow/Maintenance first. Key off and out, Forward/Reverse in Neutral, park brake on. Put the Tow/Run (Club Car) or Run-Tow/Maintenance (E-Z-GO) switch in Tow before you disconnect or connect any battery cable or wire. Both makers say so; Club Car warns that skipping it can cause a battery explosion.
- Disconnect the pack for every resistance test. Main negative cable off first, then wait 90 seconds for the controller's capacitors to drain (Club Car). Ohm readings on a live circuit are meaningless and can damage the meter.
- Remove rings, watches and chains. Wear safety glasses (Club Car calls for a face shield and rubber gloves near batteries) and use insulated tools.
- No sparks near flooded batteries. Charging makes hydrogen, which E-Z-GO says is explosive at concentrations as low as 4%. Don't test right after a charge in a closed garage, and make your last jumper connection away from the battery tops.
- Live tests only with the drive wheels in the air. Chock the front wheels, lift one end with a jack rated for at least 1,000 lb and set the frame on jack stands. Keep everyone clear of the spinning wheels and never crawl under the cart.
- Never bridge the two big posts with a screwdriver or jumper to "see if it runs." The cart can lurch, the arc can burn you, and it can damage the controller.
If a cable or terminal is melted, a battery is hot or swollen, or you smell burning, stop here and call a technician.
What you're testing
A golf cart solenoid is a heavy-duty relay. The two small terminals feed a coil. When the key, direction switch and pedal (or the controller) put voltage across that coil, it pulls a plunger that bridges the two big posts and sends pack current on to the controller and motor. That gives you two separate things that can fail:
- The coil can burn open (no click at all, even with voltage on it) or short.
- The contacts can burn and pit, so the solenoid clicks but passes little current, or weld shut, so the cart won't shut off when it should.
Two extra parts often hang on the terminals and change your readings. A pre-charge resistor across the big posts reads about 250 ohms on a Club Car Precedent, so a "closed" reading at rest may just be the resistor. A suppression diode across the small posts can upset a coil resistance reading. Our guide to the solenoid diode and resistor covers what each one does and how to test it.
One more thing worth knowing before you start: a click doesn't need full voltage. Albright, which makes the SW180-type contactors used on many carts, rates its coils to pull in at no more than 60% of their rated voltage and to drop out somewhere around 10 to 25%. A 48V coil can click on a pack that has sagged far below what the motor needs. That's why "it clicks" never clears the batteries or the contacts.
Tools
- Digital multimeter with DC volts (200V range) and ohms. Touch the leads together first and note the reading; subtract it from any low-ohm measurement.
- Two insulated jumper leads with alligator clips (bench test only).
- Insulated wrenches, including a second wrench to hold the lower nut on the big posts.
- Safety glasses, wheel chocks, a floor jack and two jack stands.
- Masking tape and a marker, or your phone camera, to record which wire goes where.
Which test do you need?
- If the charger is plugged in, Tow/Run is on Tow or the selector is between gears → fix that first. Most carts won't close the solenoid in those states.
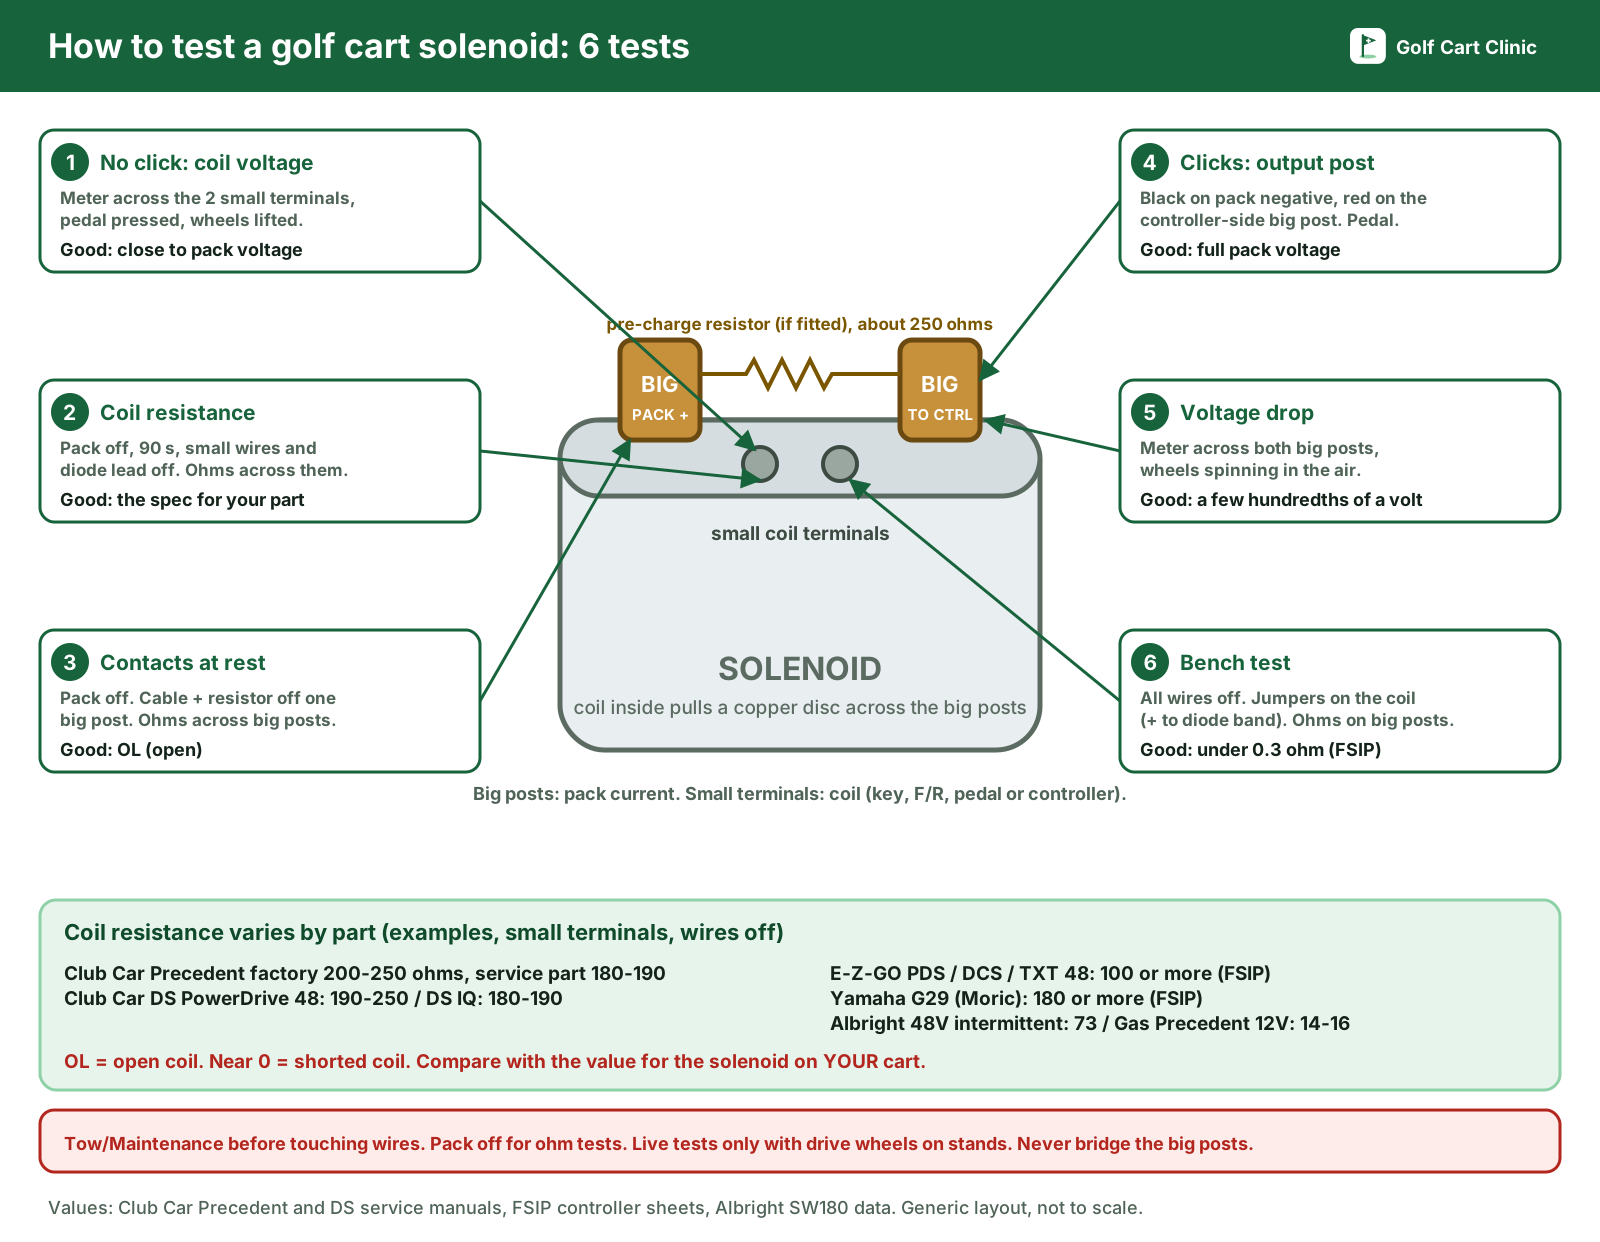
- If there's no click when you press the pedal → Test 1 (is the coil getting voltage?), then Test 2 (coil resistance).
- If it clicks but the cart won't move, or moves weakly → Test 4 (does the output post come up?), then Test 5 (voltage drop across the contacts).
- If the cart keeps running after you let off, or a Club Car shows MAIN WELDED → Test 3 (contacts at rest). Welded contacts mean replace the solenoid.
- If the solenoid is already off the cart, or you just bought one → Test 2 plus the bench test (Test 6).
Test 1: Is the coil getting voltage? (no click)
This tells you whether the problem is the solenoid or the circuit that drives it. Drive wheels lifted and on stands, pack connected, Tow/Run on Run, key on, Forward selected.
- Set the meter to DC volts, 200V range.
- Put the probes on the two small terminals, one on each. Measure across them, not to the frame: on many carts the controller switches the coil's negative side. On Club Car IQ and Excel carts, for example, the controller closes the solenoid by grounding the blue/white wire on pin 12 of its 16-pin connector.
- Have a helper press the pedal.
- Close to pack voltage, but no click: the coil is open or the plunger is stuck. Confirm with Test 2, then replace the solenoid.
- No voltage (or very little): the solenoid isn't being told to close. Look upstream: key switch, Tow/Run, Forward/Reverse switch, pedal switch or throttle sensor, charger interlock and the controller. Our golf cart won't move guide walks the no-click path, and the brand guides list the controller pin readings: E-Z-GO TXT, Club Car DS, Club Car Precedent and Yamaha Drive2.
- A minus sign on the meter just means the probes are reversed. Note which post is positive; you'll need it if the solenoid has a diode.
Test 2: Coil resistance
Tow/Run on Tow, pack disconnected (negative first) and 90 seconds gone by. Photograph the small wires, then pull them off both small terminals. If a diode is fitted across them, take one of its leads off too: Club Car's PowerDrive 48 procedure measures the coil with the diode and the yellow wire removed. Set the meter to ohms and measure across the two small terminals.
- OL or infinite: the coil is open. Replace the solenoid.
- Zero or near zero: the coil is shorted. Replace the solenoid.
- A steady reading: compare it with the value for the part on your cart, not a number from a forum. Coil values vary a lot between makers:
| Cart or solenoid | Coil across the small terminals | Source |
|---|---|---|
| Club Car Precedent, electric, factory solenoid (smaller, label SOL5006) | 200 to 250 ohms | Club Car 2009-2011 and 2016 Precedent service manuals |
| Club Car Precedent, electric, service replacement (larger, label SOL0605) | 180 to 190 ohms | Same manuals |
| Club Car DS, PowerDrive System 48 (1998-1999 supplement) | 190 to 250 ohms, diode and yellow wire removed | Club Car PowerDrive 48 service supplement |
| Club Car DS, IQ System | 180 to 190 ohms | Club Car 2005 IQ service supplement |
| Club Car Precedent IQ with Curtis 1510 controller | No less than 100 ohms | FSIP sheet, Curtis 1510 |
| E-Z-GO PDS, DCS and TXT 48 (Curtis 1206MX, 1206SX, 1206HB) | No less than 100 ohms | FSIP sheets |
| E-Z-GO series TXT (Curtis 1206-03/-04) | 100 to 250 ohms, depending on solenoid type | FSIP sheet |
| Yamaha G29/Drive with Moric controller | No less than 180 ohms | FSIP sheet, FX503 G29 YDRE |
| Albright SW180-type contactor, 36V / 48V coil | 44 / 73 ohms (intermittent duty), 102 / 150 ohms (continuous duty) | Albright SW180 brochure |
| Club Car Precedent gas, 12V starter solenoid | 14 to 16 ohms | Club Car 2016 Precedent service manual |
Notice the trap in that table: a healthy 48V Albright intermittent coil reads 73 ohms, which would "fail" the 100-ohm minimum FSIP gives for factory E-Z-GO parts. If your cart has an aftermarket solenoid, look up that maker's figure from the part number on its label. A reading well below the listed value usually means shorted turns; a reading far above it, or one that jumps around as you wiggle the terminals, points to a broken coil lead.
Test 3: Contacts at rest (stuck or welded)
Still with the pack disconnected and the controller discharged:
- Take the heavy cable(s) and the pre-charge resistor lead off one big post. Use a second wrench on the lower nut so you don't twist the post. Club Car notes that if the resistor stays connected, the meter will read about 250 ohms, which is the resistor, not the contacts.
- Set the meter to ohms and measure across the two big posts.
- You want no continuity (OL). Continuity at rest means the contacts have welded closed. Replace the solenoid. On a Club Car with a handset, this is the MAIN WELDED fault: the contacts won't drop out when you release the pedal or turn the key off.
Refit the cables and resistor, nuts snug. Club Car's figure for the Precedent's big-post nuts is 77 in-lb (8.7 N·m); use your cart's manual for other models.
Test 4: Do the contacts close? (output post voltage)
This is the classic in-cart test and the quickest answer to "it clicks but won't go." Reconnect the pack with Tow/Run on Tow, then switch to Run. Drive wheels up, chocks in.
- Black lead on the pack main negative.
- Red lead on the big post fed from pack positive. It should read full pack voltage. If not, the fault is between the pack and the solenoid: cable, terminal or a main fuse.
- Move the red lead to the other big post (the controller side). Key on, Forward, pedal pressed. When it clicks, this post should come up to full pack voltage. Release the pedal and it should fall away.
If the cart has a pre-charge resistor, the output post will already show some voltage before the click. That's normal. What matters is whether it reaches full pack voltage when the solenoid closes. Our solenoid clicking but won't move guide covers the battery load test that goes with this.
Test 5: Voltage drop across closed contacts (worn but not dead)
Burned contacts often pass Test 4 with no load, then choke when the motor pulls current. This test catches that.
- Drive wheels in the air, everyone clear of them. Meter on DC volts, a low range if yours isn't auto-ranging.
- Put one probe on each big post of the solenoid.
- Key on, Forward, press the pedal so the wheels spin, and read the meter.
Good contacts drop almost nothing. Albright's data sheet puts the typical drop across new SW180 contacts at about 30 millivolts (0.03V) at 150 amps. Spinning wheels in the air draw far less than that, so a healthy solenoid should read a few hundredths of a volt or less. If you see whole volts across the posts while the motor turns, the contacts are burned and the solenoid is wasting power as heat. Replace it. Repeat the test a few times: pitted contacts can be good on one click and bad on the next.
Test 6: Bench test (solenoid off the cart or all wires off)
This is the check FSIP, a Curtis controller remanufacturer, has installers do before fitting a controller. It works on a solenoid in your hand or still bolted in with every wire removed.
- Measure the coil (Test 2).
- Set the meter to ohms and clip it across the two big posts. It should read OL.
- Clip a jumper to each small terminal first. If the solenoid has a diode, the positive jumper goes on the terminal at the diode's banded end; the other way round, the diode shorts your jumpers.
- Connect the other ends to the pack's main positive and negative, the last connection away from the battery vent caps. The solenoid should click.
- FSIP's pass mark: the meter must jump from infinity to less than 0.3 ohm. Disconnect the jumpers at the pack end first.
Most budget meters can't measure tenths of an ohm well, which is why Test 5 is the better contact test with the solenoid on the cart. Use the bench test to confirm a new part closes before you bolt it in.
What your readings mean
| Result | What it means | What to do |
|---|---|---|
| No click, pack voltage across the small terminals | Open coil or stuck plunger | Confirm with Test 2; replace the solenoid |
| No click, no voltage across the small terminals | Control circuit isn't closing | Check key, Tow/Run, F/R, pedal switch, interlock, controller |
| Coil reads OL or near zero | Open or shorted coil | Replace the solenoid |
| Big posts read about 250 ohms at rest | That's the pre-charge resistor | Lift the resistor lead and measure again |
| Big posts show continuity at rest, resistor off | Welded contacts | Replace the solenoid |
| Clicks, output post stays below pack voltage | Contacts not closing | Replace the solenoid |
| Clicks, whole volts across the big posts with wheels spinning | Burned, pitted contacts | Replace the solenoid |
| Everything passes, cart still won't move | Problem is past the solenoid | Cables, F/R switch (series carts), controller, motor, pack under load |
Gas carts: the starter solenoid
On a gas cart the solenoid switches the 12V battery to the starter/generator, so the numbers are different. Club Car's procedure for the gas Precedent (Subaru EX40) is a good model: the coil should read 14 to 16 ohms across the small posts. For the contact side, take the heavy wire and the small red wire off one big post, keep them away from the frame and cover the other post. With the selector in Neutral, the maintenance/neutral lockout switch in Maintenance and the key on, the empty post should read no voltage to ground with the pedal up, and battery voltage with a click when you press the pedal. If not, replace the solenoid.
Replacing it after a failed test
- Match the coil voltage to what drives it (36V, 48V or the cart's own value), and the contact rating to your controller's current. Albright winds coils for intermittent duty (up to 70% on-time) or continuous duty (100%), so copy the duty of the original, not just its voltage.
- Move the diode and resistor if the old part had them and the new one doesn't, and get the diode band on the positive side. See solenoid diode and resistor.
- Clean the ring terminals and replace any that are discolored or loose on the cable. Hold the lower nut with a second wrench as you tighten.
- Reconnect in Tow. On PDS carts, E-Z-GO says to wait at least 30 seconds after connecting a battery before moving its switch back to Run.
- Retest with Test 4 and Test 5 before you put the seat back on.
When to stop and call a technician
- Melted cable insulation, a burnt terminal or a scorched solenoid base.
- A new solenoid that fails the same way within days. Something upstream (diode backwards, controller output, wrong coil) is killing it.
- The cart moves with the pedal up, or keeps running after you let off.
- Any battery that is hot, swollen or leaking.
More guides by symptom are in our golf cart troubleshooting section. If a battery sparks when you hook up the last cable, see golf cart sparks when connecting the battery.
Frequently asked questions
How do I know if my golf cart solenoid is bad?
Check both halves. No click with close to pack voltage across the small terminals means a bad coil. A click with the output post staying below pack voltage, or whole volts across the big posts while the wheels spin, means bad contacts. Continuity across the big posts at rest, with the resistor disconnected, means welded contacts.
How many ohms should a golf cart solenoid coil read?
It depends on the part. Club Car's Precedent factory solenoid reads 200 to 250 ohms and the service replacement 180 to 190; FSIP's sheets give at least 100 ohms for factory E-Z-GO solenoids and at least 180 for a Yamaha G29. An aftermarket Albright 48V intermittent coil reads 73 ohms. OL or near zero is a failed coil on any of them.
Can I test a solenoid without taking it off the cart?
Yes. Tests 1, 4 and 5 are done in place with the pack connected and the drive wheels lifted. For the resistance tests you only need to disconnect the pack and lift the wires off the terminals you're measuring.
Why does the solenoid click when the batteries are low?
The coil needs far less voltage to pull in than the motor needs to turn. Albright rates its coils to pull in at 60% of rated voltage or less. A click only tells you the coil worked.
Why do I read about 250 ohms across the big posts?
That's the pre-charge resistor wired across them. Club Car says to disconnect it before checking the contacts, or you'll read about 250 ohms instead of an open circuit.
Can I jump the big posts to test the cart?
Don't. Bridging the big posts sends full pack current through your tool, can make the cart lurch and can damage the controller. The voltage tests above tell you the same thing safely.
Sources
- Club Car, 2009-2011 Electric Precedent maintenance and service manual (general warnings, Test Procedure 3 solenoid activating coil, Test Procedure 17 pin 12, Test Procedure 22 solenoid continuity, 77 in-lb post torque): PDF hosted by GolfTechs
- Club Car, 2016 Precedent maintenance and service manual (disconnecting the batteries, Test Procedures 7 to 9 for the coil, 250 ohm pre-charge resistor and solenoid continuity, MAIN WELDED and MAIN COIL faults, gas Test Procedure 8 starter solenoid): PDF hosted by gfretwell.com
- Club Car, 1998-1999 PowerDrive System 48 service supplement (DS coil test with diode removed): PDF hosted by GolfTechs; Club Car 2005 IQ System supplement (DS IQ coil value, pin 12 coil ground): Scribd
- FSIP (Flight Systems Industrial Products), controller install and troubleshooting sheets with the main solenoid check: E-Z-GO TXT 48, Curtis 1206HB, PDS, Curtis 1206MX, DCS, Curtis 1206SX, series TXT, Curtis 1206-03/-04, Club Car Precedent IQ, Curtis 1510, Yamaha G29, FX503
- Albright International, SW180 data sheet (contact voltage drop, pull-in and drop-out voltage, duty types): albrightinternational.com; SW180 series brochure, rev. 2 (coil resistance table): PDF copy
- E-Z-GO, electric TXT owner's manual and service guide (Run-Tow/Maintenance before battery work, 30-second wait, insulated tools, hydrogen): PDF hosted by MyGolfBuggy
- Your cart's own owner's and service manual. Where it differs from this guide, follow it.
Last checked against the documents above on October 27, 2026. Club Car, E-Z-GO, Yamaha, Curtis and Albright are trademarks of their owners; Golf Cart Clinic is independent and not affiliated with any of them.
Questions and comments
No comments yet. Corrections and notes from your own repair are welcome.